New Furnace Installation by Certified Utah Technicians
Utah Furnace Repair connects you with licensed, certified installers who handle Carrier, Lennox, Trane, Rheem, and every major brand. Free estimates, financing options, and installation warranties included.
Still deciding whether to replace?
This page is about the install process: pre-install walkthrough, ductwork compatibility, permits, and how install day actually works. If you're still working out whether to replace your furnace at all, what efficiency level (AFUE tier) makes sense, and what size you actually need, start with our furnace replacement page. It covers the decision framework, the 5,000 rule, AFUE tier comparison, altitude sizing, and 2026 utility rebates.
Professional Furnace Installation Across Utah
A new furnace is one of the larger investments you'll make in your home. The difference between a system that runs cleanly for 20 years and one that gives you trouble from week one comes down to how it was installed. Wrong-size equipment, sloppy gas connections, ductwork that wasn't adjusted to handle the new airflow, and skipping the altitude calibration step are the leading reasons furnaces fail early in Utah.
Our network of certified installers follows the manufacturer's specs on every install. That means properly sizing the furnace based on your home's square footage, insulation, windows, and Utah's elevation. It means adjusting the gas pressure for your altitude. And it means delivering a system that heats your home evenly, with no rooms that won't warm up and no cold spots.
What's Included in a Furnace Installation
Step 1: Walking Through Your Home First
Before recommending any equipment, the installer does a 30 to 45 minute walkthrough to figure out what your home actually needs. Three things drive that decision. First, your home's heating load (calculated using your square footage, insulation quality, window count, and ceiling height) tells the installer what size furnace will keep up on the coldest day of the year. Second, your existing ductwork (the metal channels that distribute air through the house) is checked to see whether it can handle the airflow a new furnace expects. Third, the gas line is checked to make sure it's the right size for the new furnace's gas demand.
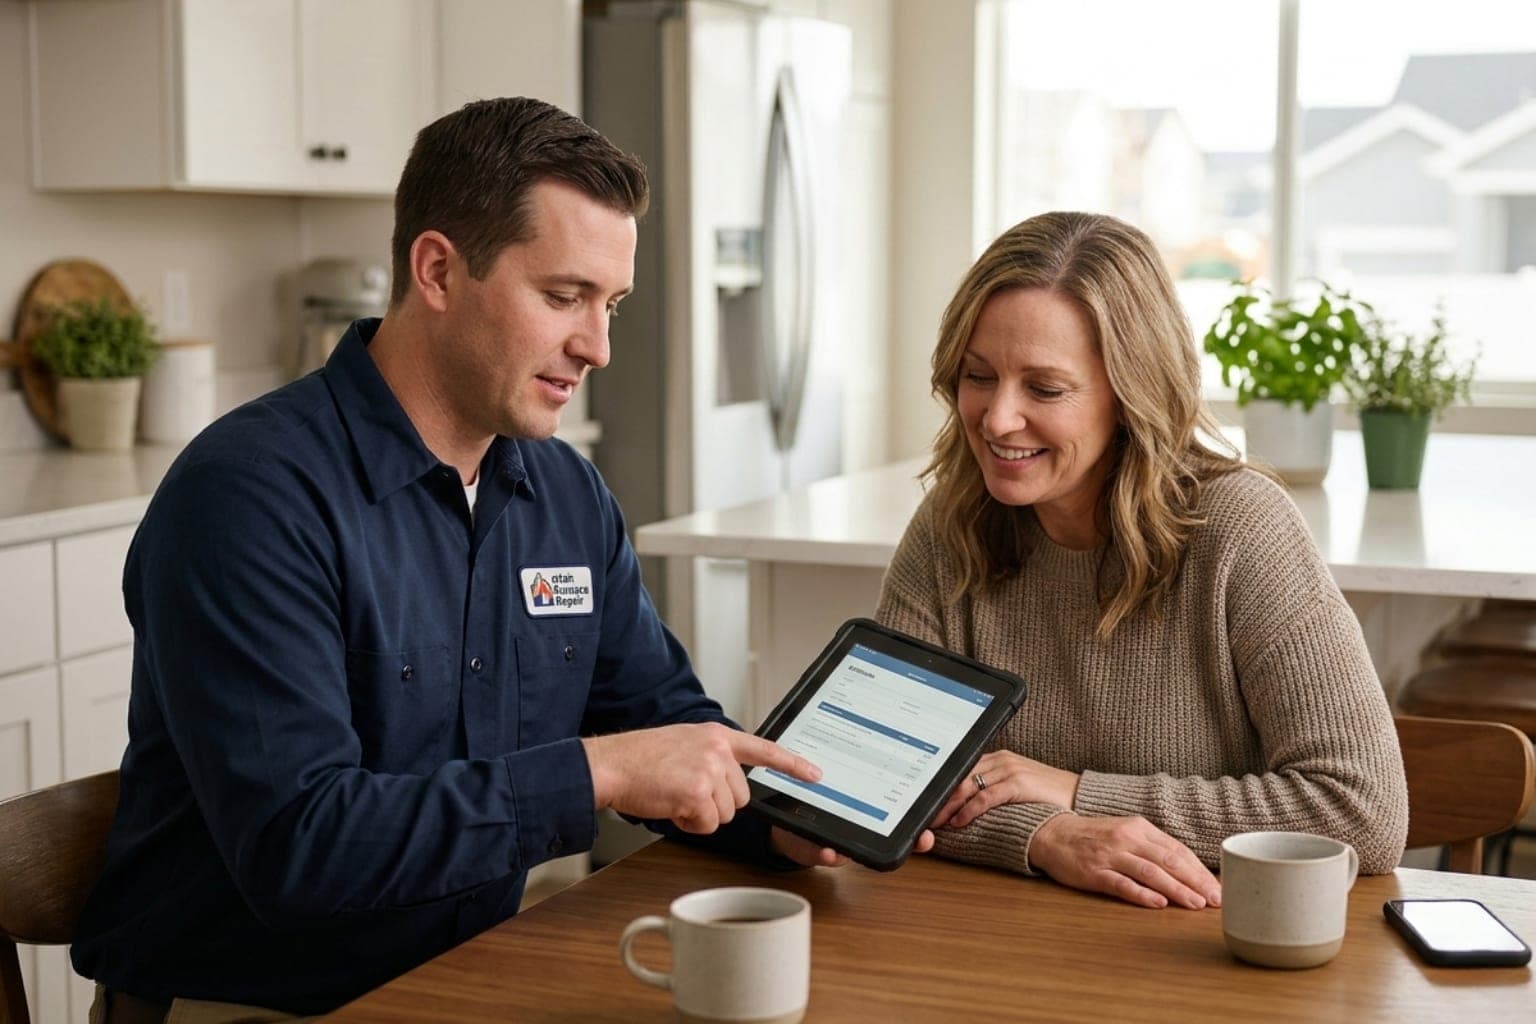
By the end of the visit, the installer can tell you whether your install will be straightforward or whether ductwork, gas line, or electrical upgrades are needed first. Honest installers flag those needs in the estimate, not after the new furnace is sitting on the floor.
Step 2: Equipment Selection (Already Decided? Skip This)
If you arrive on this page already knowing what brand and efficiency level you want, the installer confirms compatibility with your home's ductwork, gas line, and electrical setup, then orders the unit. That decision (efficiency tier, single vs. two-stage vs. modulating, brand) is covered in detail on our furnace replacement page.
If you haven't decided yet, the installer walks you through the options during the same visit. Most Utah single-family homes end up at a 95% AFUE single-stage furnace because that tier qualifies for the Enbridge Gas ThermWise rebate and the payback math works inside 6 to 9 years versus an 80% AFUE unit.
Step 3: The Install Day Itself
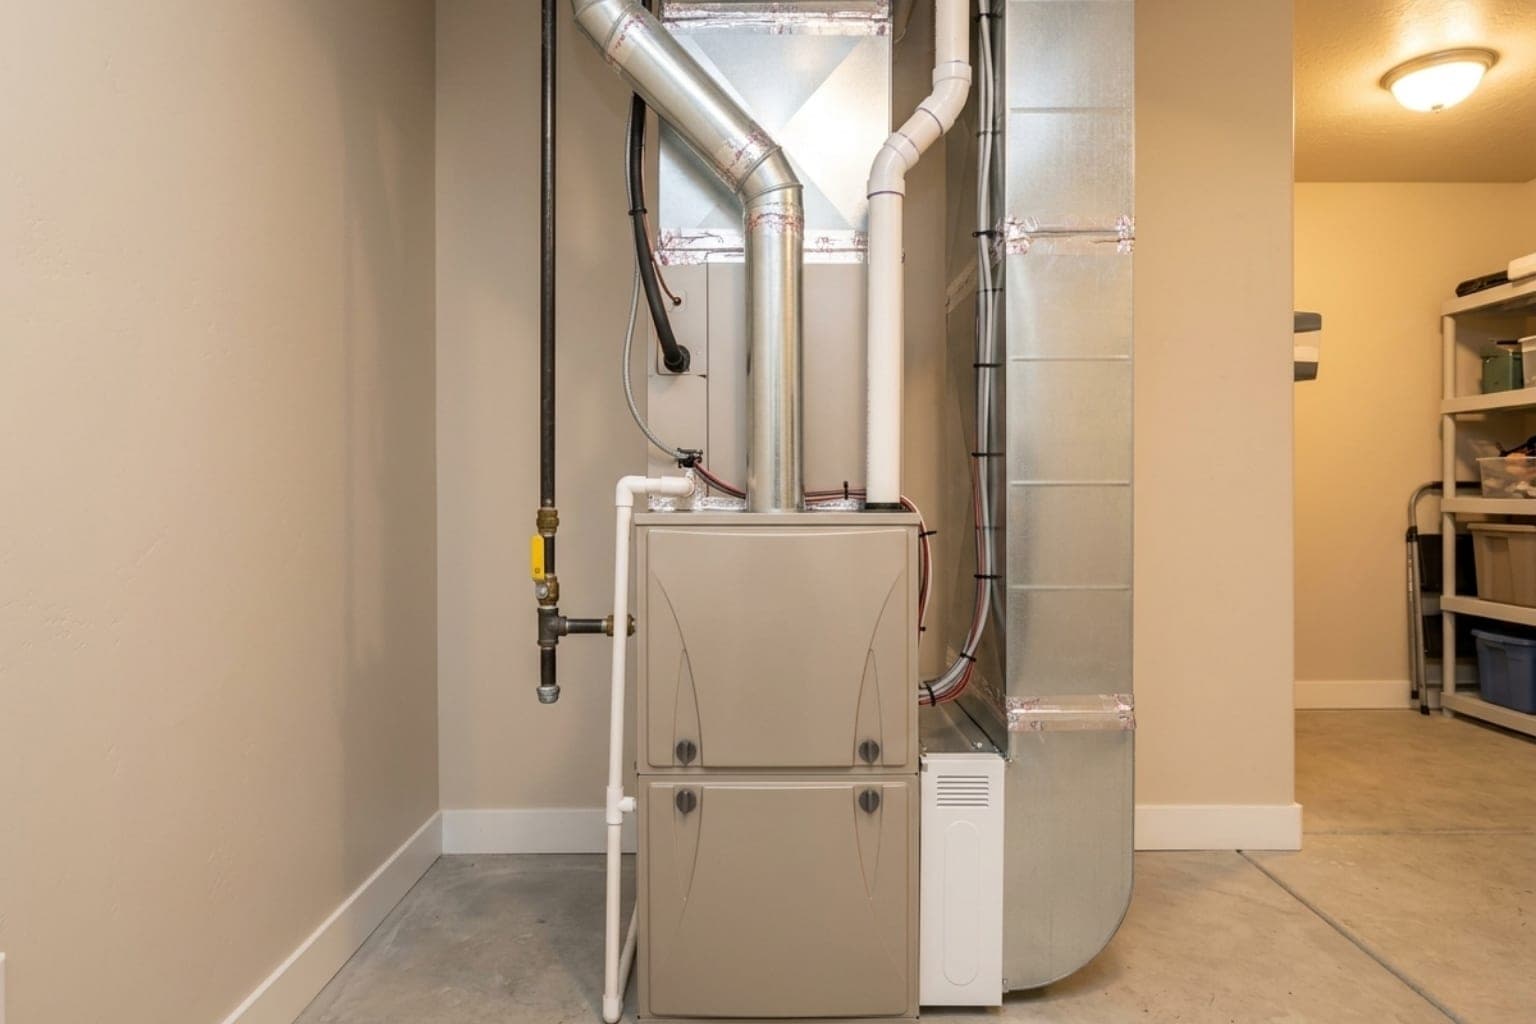
A straightforward replacement is a single-day job. Typical sequence: the installer arrives in the morning, removes and hauls away your old unit (1 to 2 hours), positions and connects the new furnace (3 to 4 hours), connects ductwork and seals the joints, runs a condensate drain line if it's a high-efficiency unit, wires up electrical, and routes the exhaust vent (PVC pipe for high-efficiency units, metal flue for 80% units).
Multi-day installs are needed when there's significant ductwork to redo, when the gas line has to be replaced, when you're switching fuel types, or when you're adding new air conditioning at the same time. The installer will confirm the timeline during the walkthrough so you're not surprised.
Step 4: Verifying Everything Works Before Leaving
Before the installer packs up, they confirm the new furnace is running cleanly. They use a combustion analyzer (a meter that reads what's coming out of the flue) to verify the burners are firing correctly with safe carbon monoxide levels. They measure the gas pressure to confirm the altitude derate is properly set. They verify airflow through the ductwork. They watch the furnace go through several full ignition cycles to confirm it starts and shuts off cleanly. And they test the three safety switches that protect the furnace from overheating, flame rollout, and venting problems.
They'll also program your thermostat, walk you through how the new system works, and hand off paperwork for the building permit, manufacturer warranty registration, and any utility rebate forms (ThermWise from Enbridge Gas, Wattsmart from Rocky Mountain Power) that apply to your install.
Will Your Existing Ductwork Handle a New Furnace?
This is the install question that gets skipped most often, and it's the one that matters most for retrofit installs. A new high-efficiency furnace can only perform as well as the ductwork allows. Modern furnaces use variable-speed ECM blowers (a quieter, more efficient motor type) that expect ductwork that doesn't restrict airflow. Many older Salt Lake homes have ductwork that's far too restrictive for that. Drop a premium furnace into too-tight ducts and you get a frustrated homeowner, an underperforming system, and equipment that wears out faster.
How the Installer Tests Whether Your Ducts Are Ready
Before committing to the install, a good installer measures airflow restriction in your existing ducts (called static pressure) using a small gauge. Healthy ducts read at or below a specific level for the type of furnace going in. Above that, the new blower has to work too hard, which strains the motor, drops efficiency, and can shorten the heat exchanger's life.
High static pressure usually traces to one of a few causes: an undersized return duct, a high-density filter installed without enough return surface area to feed it, kinked or crushed flexible duct, or partially blocked supply ducts. If the reading is far above spec, ductwork has to be modified before the install can proceed.
Why Return Ducts Are Usually the Bottleneck
In older Salt Lake homes, the return ducts (the channels that pull air back to the furnace) are almost always the weak link. Modern variable-speed furnaces move a lot of air at low speed and need adequate return space to do it. Many 1980s and 1990s Wasatch Front homes were built with returns half the size they should be for today's equipment. Insufficient return path is the number-one reason a new high-efficiency furnace fails to perform as advertised.
During the walkthrough, the installer checks the location and size of your return grilles and the path the return ducts take back to the furnace. Adding return capacity (an extra grille and duct run) typically runs $300 to $1,200, depending on how accessible the install location is.
What Changes When You Upgrade from 80% to 90%+ Efficiency
Going from an older 80% efficiency furnace to a modern 90%+ unit isn't just swapping the box. High-efficiency furnaces produce a small amount of acidic water as they run (called condensate), which has to be piped to a drain. The exhaust vent changes from a metal flue running up the chimney to white PVC pipe routing out a sidewall or roof. The furnace pulls combustion air from outside through a separate intake pipe (called sealed combustion). And some Utah jurisdictions require a small device on the drain line that neutralizes the slight acidity of the condensate.
Older Utah homes with shared chimneys often need the chimney relined or capped during this upgrade, especially if a gas water heater also vents up that chimney. The new PVC exhaust must clear specific distances from windows, gas meters, and walkways. Utah's building code is specific about this. A good installer flags all of this during the walkthrough so you see the real total cost in the estimate, not later.
Fixing Cold Rooms While You're at It
Ductwork compatibility includes whether each room is actually getting the right amount of heat. Modern heat-load calculations often show that bedrooms (especially upstairs or on east-facing benches) run 5 to 10 degrees colder than living spaces in winter, basements have too little supply, and additions like sunrooms got tacked on without enough ductwork capacity. Common in Utah homes built before high-efficiency furnaces became standard.
During install, the technician can balance airflow by adjusting the register boots and dampers (the metal pieces inside your floor or wall vents that control how much air comes out), or recommend adding new supply runs for rooms that won't warm up evenly. The goal is matching the new furnace's airflow to what each room actually needs, instead of just leaving the layout that the original 1970s installer chose.
Installing a New Furnace in an Older Utah Home
A lot of Wasatch Front housing is old enough to have ductwork that doesn't match how modern furnaces are supposed to work. Avenues homes built between 1860 and 1930 with forced-air added decades later, Federal Heights properties from the 1920s and 1930s, Sugar House and Holladay mid-century housing, older Bountiful and Ogden neighborhoods. These homes have ductwork patterns that don't exist in newer construction. Installing a new furnace in them requires more than dropping in equipment. It requires understanding how the original system was built and what was added on top of it during decades of conversions.
Homes Originally Built for Coal Furnaces
Pre-1950 Utah forced-air systems were often gravity warm-air designs: a coal or wood furnace in the basement heated air that rose through oversized ducts (12 to 16 inches across) on its own, without a fan, by natural convection. Returns were undersized or didn't exist at all. When these homes were converted to gas through the 1950s through 1980s, an electric blower was added but the original duct layout usually wasn't replaced.
You can spot a converted gravity system by the unusually large supply trunks (the main duct branches), central floor registers near where the basement furnace sits, and very few return grilles, often just one or two in the main hallway. Modern furnaces need multiple returns per zone for proper airflow. Adding return ductwork to a gravity-loop home runs $1,500 to $4,000, depending on whether the new runs go through accessible chases or require finish work to hide.
Homes That Used to Have Boilers
Cast iron boilers (the kind that heat water and pipe it through radiators) were common in Avenues and Federal Heights homes through the 1970s. When homeowners converted to forced air through the 1970s through 1990s, the new ductwork was often improvised: ducts routed through the chimney chase the boiler used to use, returns added through closet floors, supply branches sized for whatever fit through the existing joist bays without cutting into framing.
These boiler-conversion installs often have undersized main duct branches, return paths that share space with active venting (which can cause combustion-air problems), and registers placed wherever the original installer could fit them rather than where each room actually needs heat. The installer's walkthrough determines whether the existing ductwork can be reused for a new high-efficiency unit or whether significant rework needs to come first.
Homes That Use the Floor Joists Themselves as Ductwork
Pre-1950 housing sometimes used joist bays (the empty cavities between floor joists, sometimes lined with sheet metal) as return-air paths instead of dedicated ducts. It was a common shortcut before modern duct standards existed.
These joist-bay returns leak air into wall cavities, basements, and crawl spaces, which means modern furnaces can't pull the airflow they're designed for. The fix during install is usually running new dedicated return ducts through accessible chases, closets, or basement ceilings. Lining the existing joist bays with sheet metal or flex duct helps some, but rarely solves the airflow problem completely.
Permits, Inspections, and What That Adds to Your Project
Every Wasatch Front city requires a mechanical permit for a furnace install. The permit covers a code review, confirms your installer is properly licensed, and triggers two inspections during the install (one mid-project and one at the end). You don't deal with this directly. Utah law requires your licensed contractor to pull the permit for you. Fees vary by city and add up to a small fraction of the total install cost, but knowing what applies in your area helps you understand what's on the estimate.
Salt Lake City Permit Fees
Salt Lake City charges a base $57 mechanical permit fee plus $29 per furnace unit at or below 200,000 BTU per hour, plus a 1% Utah State Fee surcharge. Typical residential furnace installation: roughly $87 total. Larger units (above 200,000 BTU/h) run $41 per unit; over 300,000 BTU/h units run $65 per unit.
These fees are current per the SLC Consolidated Fee Schedule amended June 10, 2025 by Ordinance 2025-34, and the SLC Mechanical Fee Schedule updated July 2025. Salt Lake City issues mechanical permits typically same-day or within 1 to 3 business days through the quick turnaround queue. Single-family home permits with plan review run up to 14 business days for first review.
Permit Fees in Other Utah Cities
Permit fees across the rest of the Wasatch Front cluster in a similar range:
- Herriman: $47.47 flat for basic mechanical, electrical, or plumbing permits. Furnace and AC installs at the same time combine into one permit at the same flat fee.
- North Salt Lake: $50.50 for residential mechanical permits.
- Sandy, Bountiful, Layton, and Ogden: typically $50 to $200 range for residential furnace installation, varying with jurisdiction-specific structures (some flat, some per-unit with surcharges).
- Park City: uses construction-valuation-based fee calculation rather than a flat residential fee. Higher than valley averages, with potential additional review for properties in the Park City Historic District. Get a project-specific estimate during the contractor's permit application.
For specific fees in cities not listed, your installer contacts the local building department before pulling the permit and confirms the fee with the homeowner.
Who Pulls the Permit and When Inspections Happen
Utah state law requires the contractor to pull the mechanical permit when a contractor is involved in the install. Homeowners can pull their own permit only on owner-occupied single-family dwellings, and only by submitting an Owner/Builder Certification to the Utah State Division of Occupational and Professional Licensing. Rental properties and commercial installs always require a contractor.
The permit must be issued before the install begins. Working without a permit triggers a Stop Work Order and double the normal permit fee. After the install, two inspections are required: rough-in (during install) and final (after completion). Most jurisdictions schedule inspections within 1 to 2 business days of the request.
Switching from a Boiler, Electric, or Oil System to a Gas Furnace
Switching heat sources is much more involved than swapping out an old furnace for a new one. Removing or shutting down the existing system, installing new fuel lines, and (for boiler conversions) building all-new ductwork from scratch all add to the project. Total cost is significantly higher than a straight furnace replacement, but it's often a one-time decision: you're committing to forced-air gas as the long-term setup for your home, not just buying the next furnace. Three switches cover most of what we see in Utah.
Switching from a Boiler to a Gas Furnace
Boiler-to-furnace conversion is the most involved fuel switch in older Salt Lake housing stock. Cast iron sectional boilers in Avenues, Federal Heights, and Sugar House homes (covered in detail on our boiler repair page) convert to forced-air gas typically when the boiler reaches end-of-life and the homeowner chooses central air conditioning compatibility over hydronic heating.
The conversion involves: full ductwork installation from scratch (most boiler-heated homes have no existing forced-air infrastructure), boiler decommissioning and removal, radiator removal or repurposing, gas line resizing for new BTU input, and the standard furnace install sequence. Total project cost runs $12,000 to $25,000+ depending on home size, ductwork complexity, and finish-quality requirements. Multi-week timelines are typical due to ductwork installation in finished spaces.
Switching from Electric Heat to a Gas Furnace
Electric resistance heating (baseboard, central electric furnace, or wall units) converts to gas furnace when natural gas service is available and operating cost makes the conversion economic. Wasatch Front gas rates currently run roughly one-third of electric resistance heating cost per delivered BTU, making the payback timeline 4 to 8 years for typical residential systems.
The conversion requires: gas service installation if not already present (Enbridge Gas connection runs $500 to $3,000 depending on distance from main), gas line installation inside the home, electric removal or capping, ductwork verification or new installation if existing electric uses forced-air handler with no gas-compatible ductwork. Total project cost runs $8,000 to $18,000+ depending on existing infrastructure.
Switching from an Oil Furnace to a Gas Furnace
Oil heating remains in service in some older Salt Lake homes, particularly Federal Heights and Foothill neighborhoods near the University. Oil-to-gas conversion typically follows oil delivery cost concerns, oil tank end-of-life (steel tanks typically last 25 to 30 years), or environmental concerns about underground oil tank leaks.
The conversion involves: gas service connection, oil tank decommissioning (above-ground tanks remove cleanly; underground tanks often require licensed environmental remediation if soil contamination is found), oil-fired furnace removal, vent reconfiguration, and gas furnace installation. Total project cost runs $9,000 to $20,000+ without environmental remediation; with remediation, costs escalate substantially. The technician evaluates oil tank condition during the pre-install assessment.
What an Install Adds Up To
A typical Utah furnace install lands somewhere between $4,800 and $12,000+ depending on the equipment you pick and what your home needs. The equipment itself drives most of that range. Beyond the equipment, the install-side costs that vary the most are:
Ductwork modifications (when needed): $500 to $2,000
Gas line resizing or rerouting: $200 to $800
Electrical panel upgrade: $300 to $600
Multi-zone setup: $1,000 to $3,000
Chimney liner (when going from 80% to 90%+ efficiency): $400 to $1,200
Mechanical permit: $50 to $250 depending on your city
For the equipment-side cost breakdown by efficiency tier and BTU size, see the detailed tables on our furnace replacement page. That's where the AFUE tier comparison and payback math live.
Many of our partner installers offer 0% APR financing for 12 to 60 months through third-party lenders, and Rocky Mountain Power runs rebates for qualifying high-efficiency installations. Ask the installer about available financing and rebate paperwork during the walkthrough.
How It Works
Getting matched with a trusted furnace technician is simple. Here's how we connect you with the right pro.
Tell Us Your Issue
Call us or fill out the form with details about your furnace problem. Same-day dispatch available.
Get Matched with a Tech
We connect you with a licensed, background-checked technician in your area. Usually within minutes.
Problem Solved
Your technician arrives, diagnoses the issue, and gets your heating system running. Written estimate before any work begins.
Need a Furnace Technician? We'll Match You in Minutes.
Call now or fill out our form to get connected with a licensed, background-checked heating technician in your area. Same-day availability in most locations.
DOPL-Licensed · Same-Day Dispatch · After-Hours Available
Why Homeowners Trust Us
We vet every technician in our network so you don't have to. Here's what sets our partner techs apart.
Licensed & Insured
Every technician in our network is state-licensed, fully insured, and background-checked for your peace of mind.
Same-Day Service
Most service calls are scheduled within 2-4 hours. Emergency dispatch available evenings, weekends, and holidays.
DOPL-Licensed Network
Every technician we connect you with carries an active Utah Division of Professional Licensing (DOPL) HVAC contractor license and full liability insurance. License status is verifiable through the Utah DOPL public lookup.
Transparent Estimates
You receive a written estimate before any work begins. The diagnostic charge is stated up front and rolls into your repair invoice once you approve the work, so there is no separate billing for the visit. No hidden charges, no surprise add-ons after the technician arrives.
What Utah Homeowners Say
Real reviews from homeowners we've connected with trusted local technicians.
“Our furnace died on the coldest night of the year. I called Utah Furnace Repair and they had a licensed tech at our door within 2 hours. He diagnosed the problem, had the part on his truck, and we had heat before bedtime. Incredible service.”
Sarah M.
Salt Lake City, UT
“I was quoted $4,000 by another company for a furnace replacement. Utah Furnace Repair connected me with a tech who found the real issue: a $200 igniter replacement. Honest, skilled, and saved me thousands.”
Mike T.
Sandy, UT
“From the phone call to the finished repair, the whole experience was seamless. The technician was on time, explained everything clearly, and left the work area spotless. I’ll be using this service for all my HVAC needs.”
Jennifer R.
West Valley City, UT
“We needed a new furnace installed in our home in SunCrest. The tech they matched us with was knowledgeable about high-altitude installations and did an outstanding job. Highly recommend.”
David L.
Draper, UT
“Scheduled a fall tune-up through Utah Furnace Repair. The technician was thorough, found a cracked heat exchanger we didn’t know about, and probably saved us from a dangerous situation. So grateful for the quality of their network.”
Lisa K.
Murray, UT
“Fast, professional, and affordable. The tech arrived exactly when they said he would, fixed our furnace in under an hour, and the price was very fair. This is how home services should work.”
Robert H.
Bountiful, UT
Furnace Installation FAQs
Service Areas Across Utah
Our network of licensed technicians serves communities throughout the Salt Lake City metro and beyond.
Salt Lake City
Salt Lake County
200,000+ residents
Sandy
Salt Lake County
96,000+ residents
Draper
Salt Lake County
51,000+ residents
West Valley City
Salt Lake County
140,000+ residents
West Jordan
Salt Lake County
116,000+ residents
South Jordan
Salt Lake County
77,000+ residents
Murray
Salt Lake County
50,000+ residents
Midvale
Salt Lake County
35,000+ residents
Taylorsville
Salt Lake County
60,000+ residents
Bountiful
Davis County
44,000+ residents
Layton
Davis County
82,000+ residents
Ogden
Weber County
87,000+ residents
Herriman
Salt Lake County
55,000+ residents
Riverton
Salt Lake County
45,000+ residents
Other Heating Services
Our network of partner technicians covers all your heating needs.
Furnace Repair
We connect you with licensed, background-checked heating pros in your area. Same-day appointments available.
Learn More →Furnace Maintenance
Keep your heating system running efficiently. Our partner techs perform 21-point inspections.
Learn More →Emergency Heating Repair
No heat? We dispatch a licensed technician to your home fast. Available nights, weekends, and holidays.
Learn More →Heater Repair
Gas, electric, or heat pump. Our partner techs handle all heater types. Same-day service across Salt Lake City metro.
Learn More →Heat Pump Repair
Our partner technicians are trained on all major heat pump brands. Diagnosis and repair in one visit.
Learn More →Furnace Replacement
Licensed installers across the Wasatch Front. Right-sized AFUE selection, current ThermWise rebate stacking, and same-day estimates.
Learn More →Gas Furnace Repair
Gas furnace issues require certified technicians. Our partners are licensed for gas line work and furnace diagnostics.
Learn More →Boiler Repair
Boilers require specialized knowledge. Our partner techs handle steam, hot water, and radiant systems.
Learn More →